We may earn a commission for purchases using our links. Learn more. 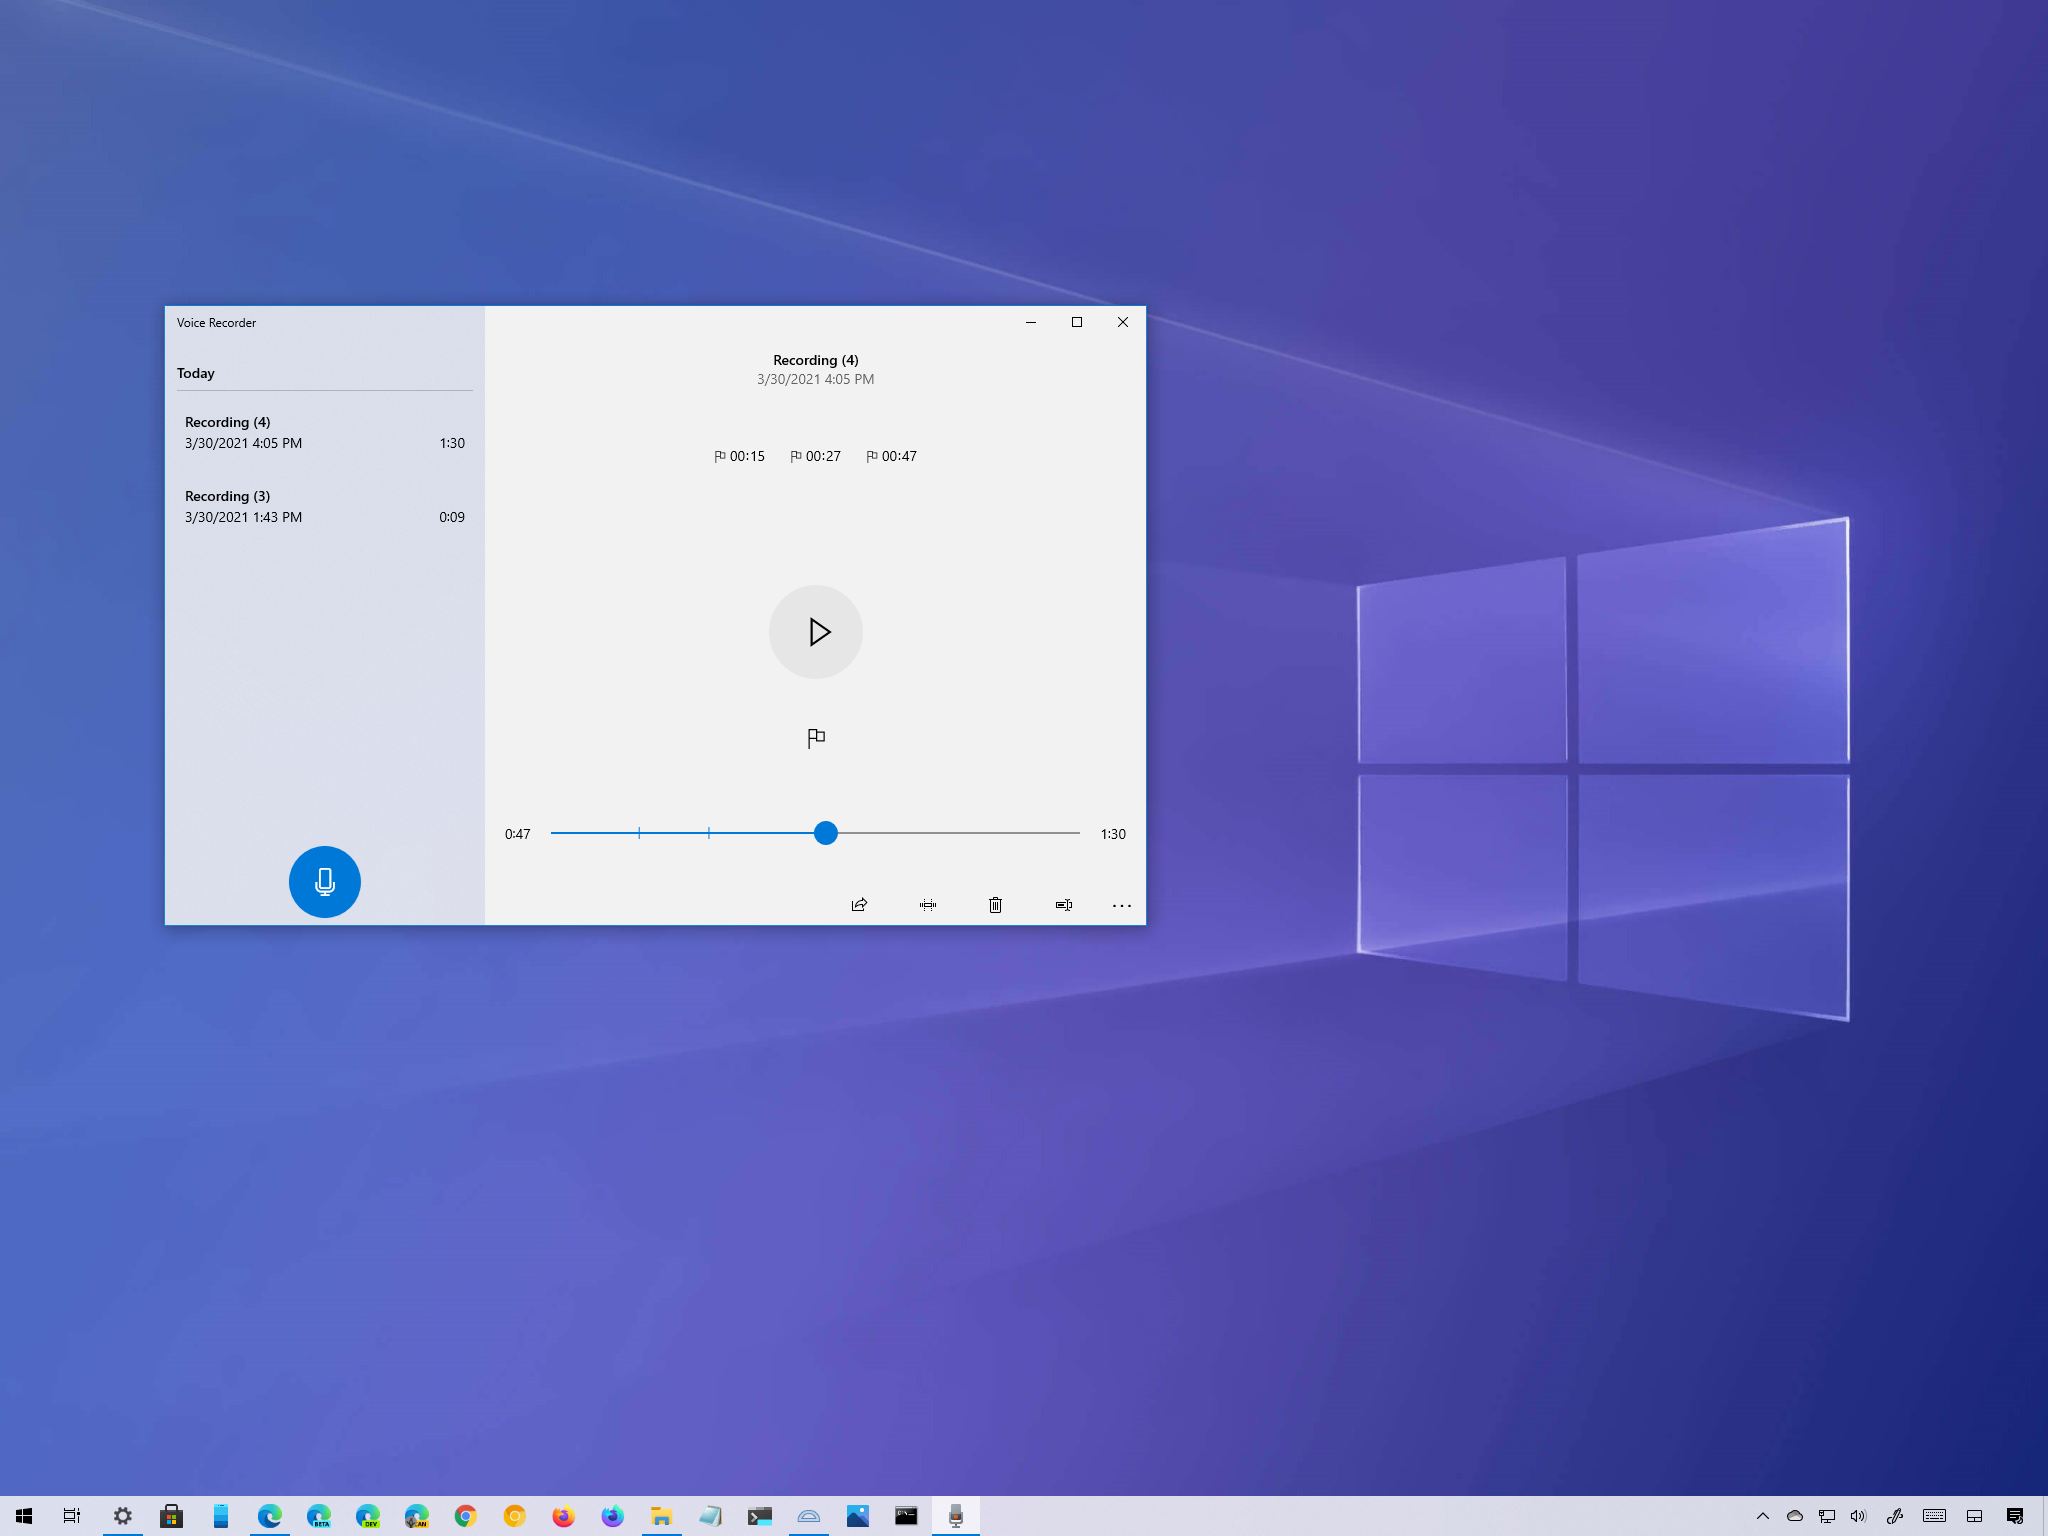 Source: Windows Central
On Windows 10, the Voice Recorder app is a quick and convenient solution that anyone can use to record lectures, conversations, interviews, podcasts, and virtually anything else.
Although you can find many other applications with many different features, the free Voice Recorder app included on Windows 10 is simple and ships with all the necessary functionalities to record, trim, flag important moments, and share audio tracks.
In this Windows 10 guide, we will walk you through the steps to use the Voice Recorder app on your computer.
Voice Recorder comes installed on Windows 10, but you will have to install it manually if you don’t have it.
To install the app to record voice, use these steps:
Click the Get button. Source: Windows Central
Once you complete the steps, the app will be available from the Start menu to record audio on your desktop or laptop.
On Windows 10, Voice Recorder is a straightforward app. You only need one of the best microphones. The one built-in on your device, the one from a webcam, or any microphone will do just fine for basic recording.
The instructions below include everything you need to get started recording, listing, and editing sound files.
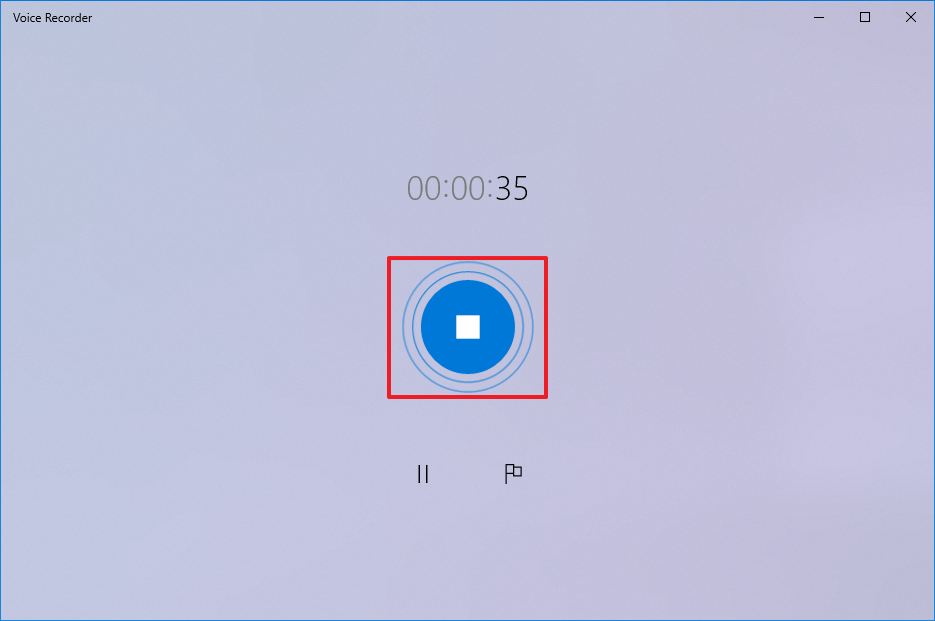
To record audio on Windows 10, make sure the microphone is connected (if applicable), and use these steps:
Click the Record button.
 Source: Windows Central
Quick tip: You can also start recording using the Ctrl + R keyboard shortcut.
(Optional) Click the Flag button to add a marker to the recording.
Quick note: This option won’t interrupt the audio recording, but you can quickly jump to important parts of the recording when editing the track. You can use the marking feature while recording or listening to the audio file.
Click the Stop button to end the voice recording.
 Source: Windows Central
Quick note: You can also use the Spacebar, Backspace, Enter, or Esc key to stop recording.
Once you complete the steps, the audio will save automatically using a .m4a file format in the “Sound recordings” folder inside the “Documents” folder.
If you need the best microphone, we recommend the Blue Yeti Nano since it offers good quality sound and a relatively low price.
The Blue Yeti Nano has impressive sound and built quality considering its price. It’s a USB-powered plug-and-play device, and it features no-latency headphone output, headphone volume, and mute button.
To play recorded audio tracks on Windows 10, use these steps:
Select the track from the left pane to play the audio.
 Source: Windows Central
Once you complete the steps, click the Pause button to stop listening or select another recording from the playlist.
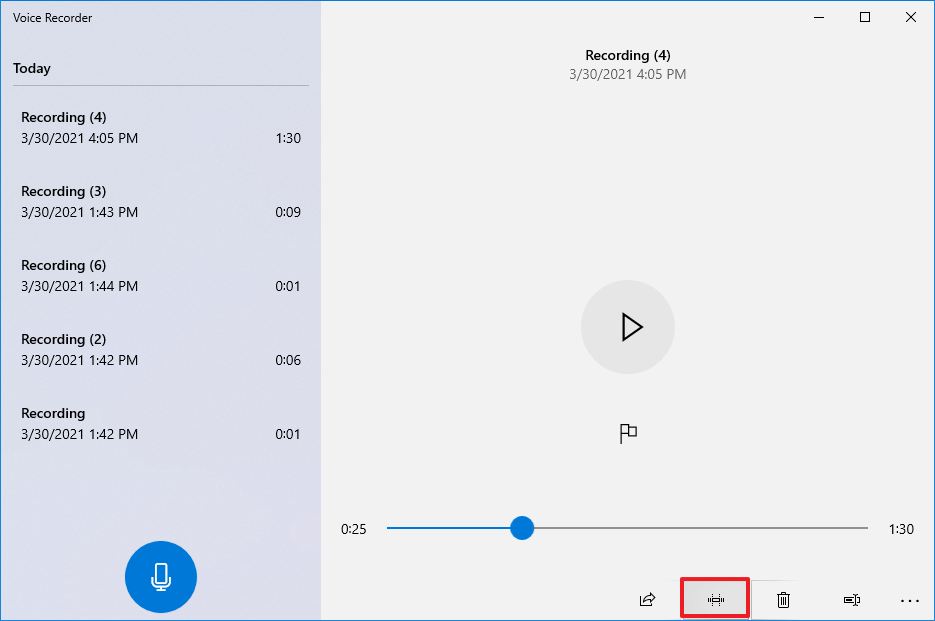
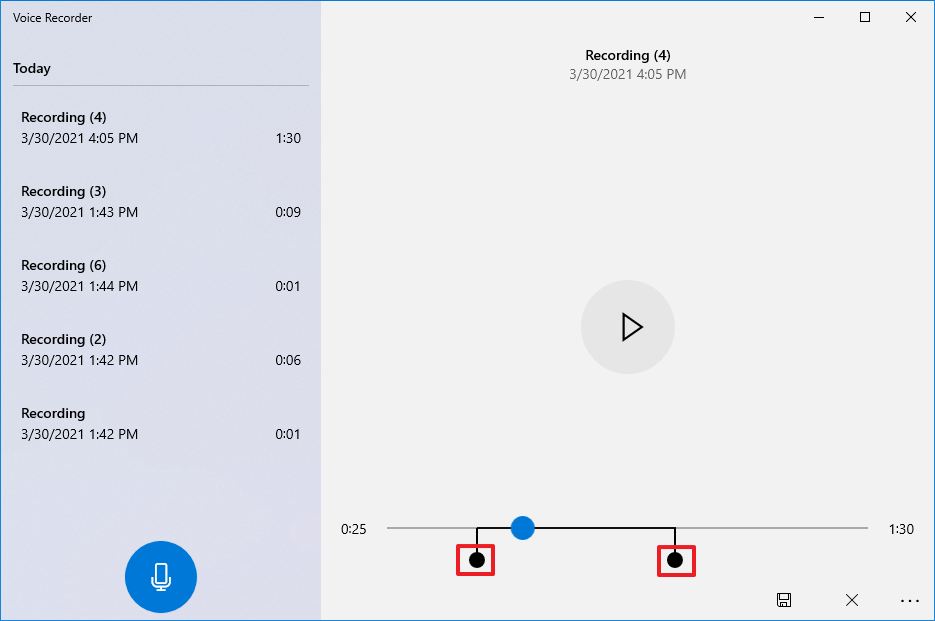
To trim an audio track after a recording session, use these steps:
Click the Trim button from the bottom-right corner.
 Source: Windows Central
Use the pins in the track to select the beginning and end of the recording, leaving out the parts you want to trim.
 Source: Windows Central
Select the Save a copy (recommended) or the Update original option.
 Source: Windows Central
After you complete the steps, you will end up with a shorter version of the file.
Although the app saves every recording file automatically, it uses generic names, which are not descriptive enough to keep your recordings organized.
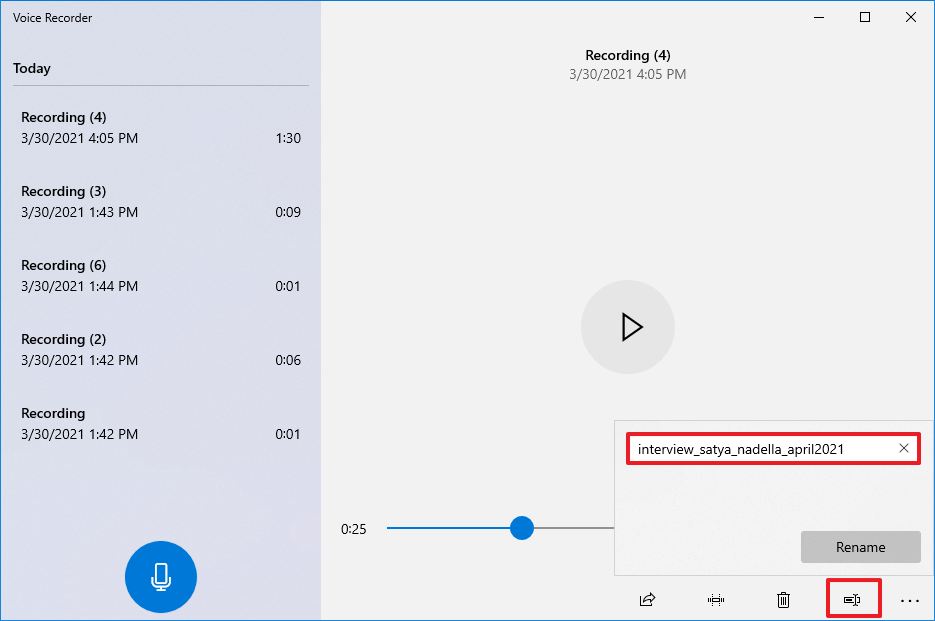
To rename a recording file on Windows 10, use these steps:
Click the Rename button.
 Source: Windows Central
Once you complete these steps, the audio file will be saved with the name you specified in the “Sound recording” folder inside the “Documents” folder.
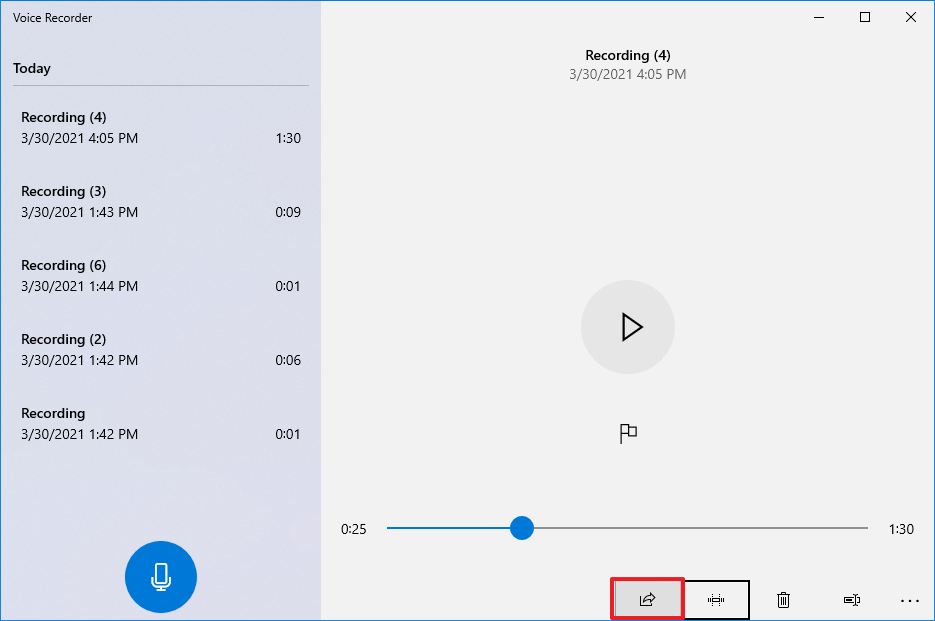
To share a recording on social media or email, use these steps:
Click the Share button from the bottom-right corner.
 Source: Windows Central
If you have to import the audio file into another project, you do not need to share it. Instead, copy and paste the file from the “Sound recordings” folder to your “Documents” folder or any other location.
In the event that the app is not working, there is likely a problem with the microphone or privacy settings on Windows 10.
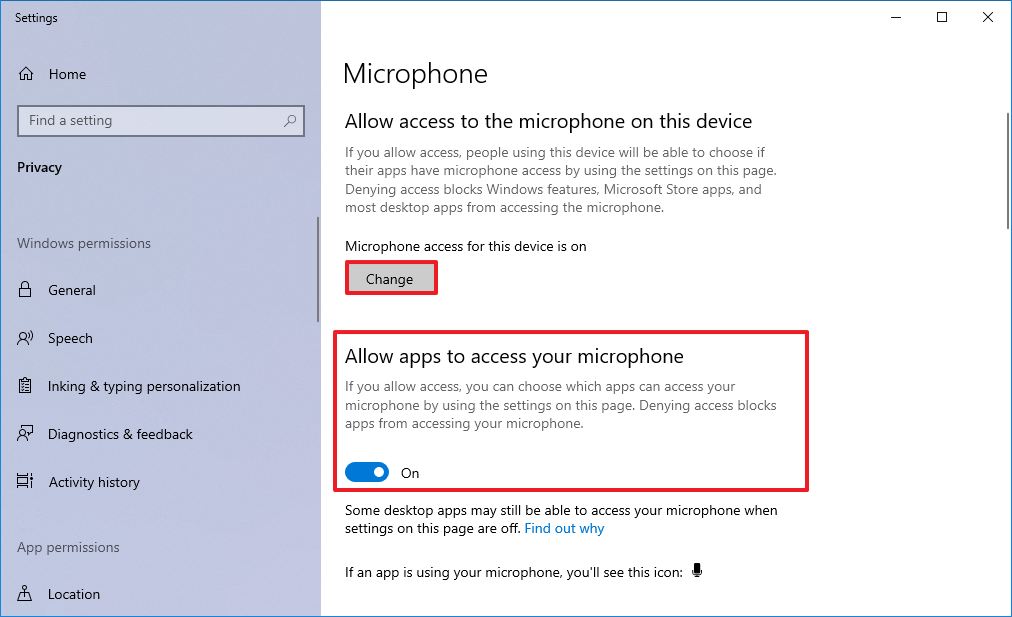
To allow the Voice Recorder app to access the microphone, use these steps:
Under the “Allow apps to access your microphone” section, make sure the toggle switch is in the On position.
 Source: Windows Central
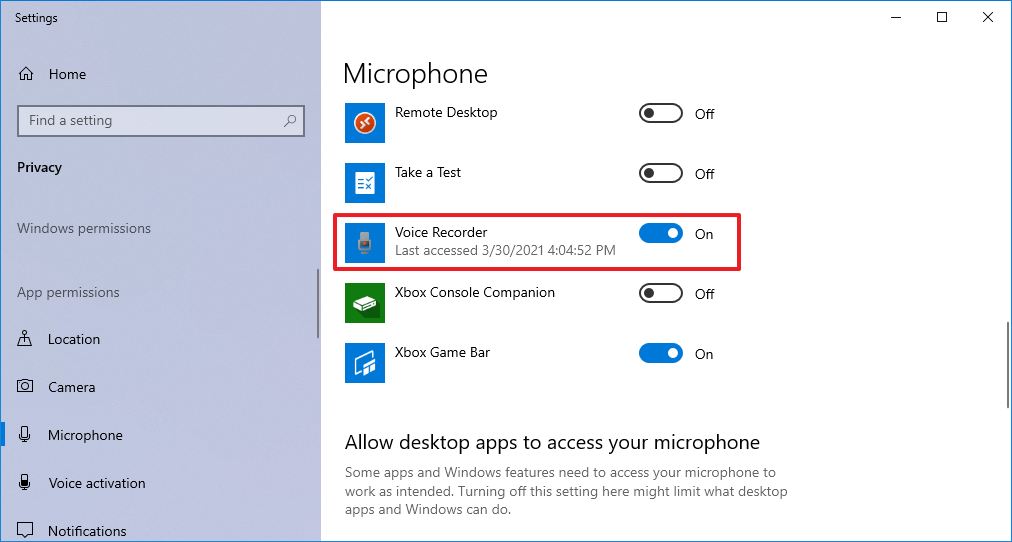
Under the “Choose which Microsoft Store apps can access your microphone” section, turn on the Voice Recorder toggle switch.
 Source: Windows Central
After you complete the steps, the app should now be able to record audio from the microphone.
If the app can’t find the microphone, you can use the “Sound” troubleshooter to fix this problem.
To fix microphone problems on Windows 10, use these steps:
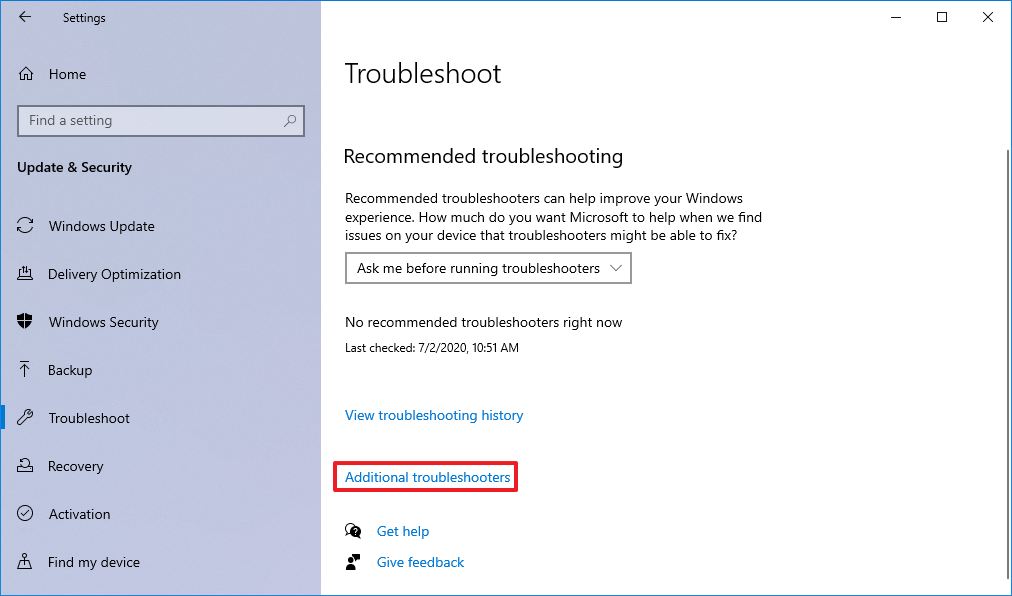
Click the Additional troubleshooters option.
 Source: Windows Central
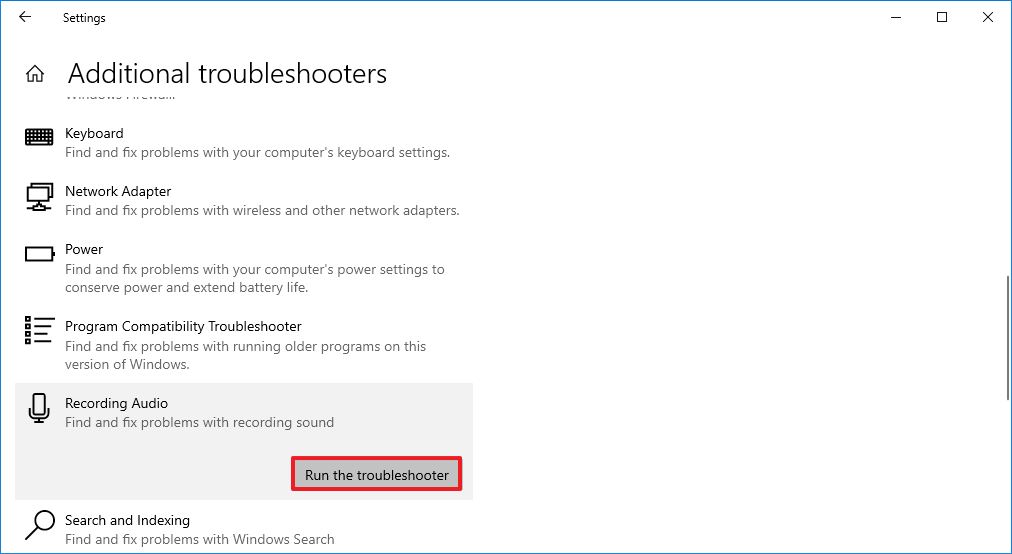
Click the Run the troubleshooter button.
 Source: Windows Central
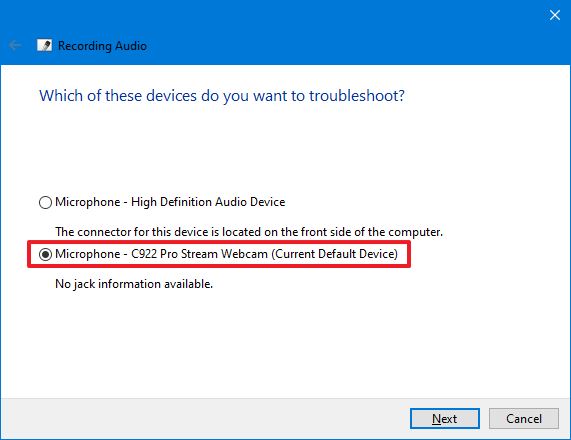
Click the Next button.
 Source: Windows Central
Once you complete the steps, any problems with the microphone should be resolved, and Voice Recorder should now work correctly.
If the microphone still does not work, check it is connected properly to the computer. In the case that you have multiple microphones, you can use these steps to set the system default. If it is a USB microphone, you can try a different port on the device or USB cable.
In the case that you have a Bluetooth microphone, confirm it appears on Settings > Devices > Bluetooth & other devices. Also, make sure that Bluetooth is enabled on your device from the settings page. You can learn more about using Bluetooth in this comprehensive guide.
For more helpful articles, coverage, and answers to common questions about Windows 10, visit the following resources:
We may earn a commission for purchases using our links. Learn more.
What’s coming to Xbox Series X, Xbox Series S, and Xbox One in the future? Here are the biggest and brightest games we’re looking forward to.
Nightdive Studios has been working on the System Shock remake since 2016, and according to the studio, it’s finally almost complete.
We’re LIVE with the Windows Central Video Podcast today at 1:30pm ET, make sure you’re there!
Super Bowl LVI is finally here. To make sure you get the best experience for the big game, make sure to grab these apps for Windows 11 and Windows 10.
Sign up now to get the latest news, deals & more from Windows Central!
I would like to receive news and offers from other Future brands.
I would like to receive mail from Future partners.
No spam, we promise. You can unsubscribe at any time and we’ll never share your details without your permission.